Format and Mount a Volume
Warning
Formatting a device/volume erases all existing data on a device, if a file system already exists on the target device/volume. If you need to retain the data on your volume, you should skip to the mount section below.
Note
This guide is based on a linux and is using Ubuntu as the Linux distro, however these commands are generic for most linux distros
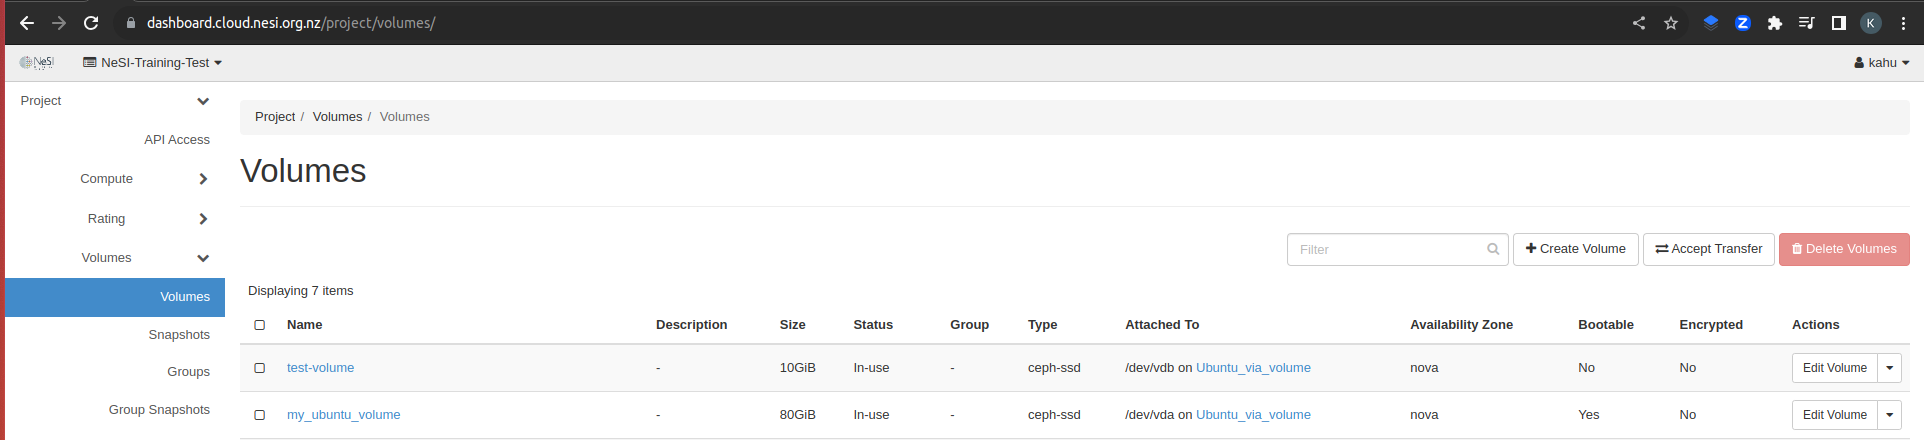
You can verify that the volume is attached to your instance via the NeSI RDC dashboard under Project > Volumes > Volumes
Connect to the instance with the attached Volume and using the command lsblk it should have an output similar to the following
$ lsblk
NAME   MAJ:MIN RM   SIZE RO TYPE MOUNTPOINTS
loop0    7:0    0  40.8M  1 loop /snap/snapd/20092
loop1    7:1    0 111.9M  1 loop /snap/lxd/24322
loop2    7:2    0  63.5M  1 loop /snap/core20/2015
loop3    7:3    0     0B  0 loop
loop4    7:4    0     0B  0 loop
loop5    7:5    0     0B  0 loop
loop6    7:6    0     0B  0 loop
loop7    7:7    0     0B  0 loop
sr0     11:0    1   482K  0 rom
vda    252:0    0    80G  0 disk
└─vda1 252:1    0    80G  0 part /
vdb    252:16   0    10G  0 disk
If we reference that output with the dashboard we can see the following drives:
Format a volume
Depending on how you created your volume, it may not have a file system and you need to create one before mounting, i.e. format the device. The exact format command syntax is dependent on the virtual machine’s operating system and the type of file system you need. The example below formats the volume attached as /dev/vdb in the Ubuntu-based instance using the ext4 filesystem.
Warning
Ensure that your drive path is the drive that you wish to format, picking the wrong one my result in data loss
To make your volume/device available to the operating system you need to mount it on a directory called a mount point. You can mount your device using an in-memory-only mount, but the mount will be lost upon rebooting your instance. We recommend you configure the mounting of your device/volume filesystem persistently using the configuration file /etc/fstab. In both examples we will create a mount point called /mnt-vol.
In memory only mount
You can use below commands to create a mount point called /mnt-vol and to mount the device /dev/vdb at that mount point.
Note
On reboot this mount will be lost and the mount command will need to be run again
Using /etc/fstab
To ensure that your Volume is remounted after a reboot of your instance, you should configure it in the file /etc/fstab.
First create the mount point /mnt-vol using:
When we mount drives in the fstab file its higly recommended that we do so using the drives UUID, we can find the UUID of the drive a few ways. We will use the command blkid
Sample output:
$ sudo blkid /dev/vdb
/dev/vdb: UUID="238c1032-4fcb-4dd7-86a2-957d3fc10201" BLOCK_SIZE="4096" TYPE="ext4"
Then use a text editor to open the /etc/fstabfile. You can do this with the command below. We are using the nano text editor in this example but you can use whichever text editor your prefer, just replace nano with the name of the text editor (Vim etc).
You can then add the following line to /etc/fstab. The /dev/vdb is the device you’re mounting and /mnt-vol is the its target mount point.
The syntax that we want to use looks like the following
Using our example UUID from the ouput of the command blkid it should look like this
This is appended to the /etc/fstab file.
The example fstab file looks like this
LABEL=cloudimg-rootfs / ext4 defaults 0 1
UUID=238c1032-4fcb-4dd7-86a2-957d3fc10201 /mnt-vol ext4 defaults,nofail 0 2
Save that file and after adjusting the /etc/fstab file you need to initiate any changes.
Use the mount all command:
We can verify the mounted volume by running the command lsblk again
$ lsblk
NAME   MAJ:MIN RM   SIZE RO TYPE MOUNTPOINTS
loop0    7:0    0  40.8M  1 loop /snap/snapd/20092
loop1    7:1    0 111.9M  1 loop /snap/lxd/24322
loop2    7:2    0  63.5M  1 loop /snap/core20/2015
sr0     11:0    1   482K  0 rom
vda    252:0    0    80G  0 disk
└─vda1 252:1    0    80G  0 part /
vdb    252:16   0    10G  0 disk /mnt-vol
We can see that the volume vdb is mounted at the path /mnt-vol
You may have to change ownership or write privileges to enable writing to the ephemeral storage, using chown, chgrp or chmod, e.g.