Networks
Create a Network
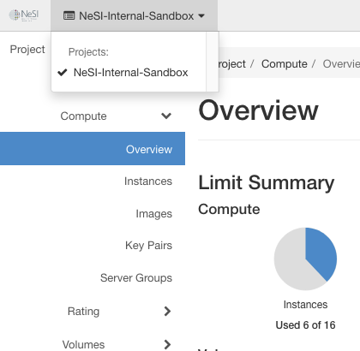
Log into the NeSI FlexiHPC Dashboard
Select the project you would like to deploy the new instance too (Use the project selector on the top left-hand side):
Open the Project tab, open the Network tab and select the Networks category
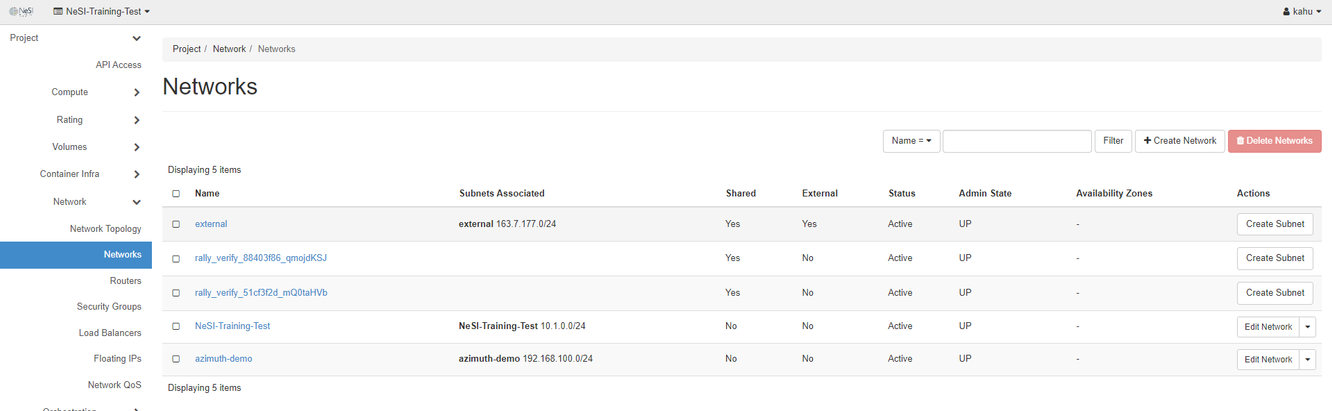
Click Create Network on the right hand side
Within the Create Network > Network dialog you have the following options.
Network Name- A friendly name for your network
Enable Admin State- If checked this will enable the network, by default leave this set to true
Create Subnet- If checked this will enable the creation of a subnet, by default leave this set to true
Availability Zone Hints- Availability zones where the DHCP agents can be scheduled. Leaving this unset is the same as selecting all Availability zones. As FlexiHPC only has 1 zone nova this value can be left unset
MTU- Maximum Transmission Unit. An MTU is the largest size frame or packet -- in bytes or octets (eight-bit bytes) -- that can be transmitted across a data link. Leaving this unset is the default unless you know what you are doing here.
Click Next
Within the Create Network > Subnet dialog you have the following options
Subnet Name- A friendly name for your subnet
Network Address- The network address in CIDR format e.g. 192.168.0.0/24 if its IPv4
IP Version- If your Network Address is an IPv4 then pick that otherwise pick IPv6. IPv4 is generally the default
Gateway IP- IP address of the gateway is generally the first IP of the network address, from our Network Address example above it would be 192.168.0.1. To use the default leave this blank.
Disable Gateway- Should you not want a gateway then check this. By default you will want your network to have a gateway.
Click Next
Within the Create Network > Subnet Details dialog you have the following options
Enable DHCP- This allows the network to auto assign an IP when a compute instance is attached to it
Allocation Pools- The IP’s you would like to allocate to compute instances when they are attached. The format should be start_ip_address,end_ip_address using our Network Address example it would be 192.168.0.20,192.168.0.50. Leave blank if you want to use any IP addresses from the specified Network Address
DNS Name Servers- Should you wish to use different name servers then the ones FlexiHPC uses please enter then here, one per line.
Host Routes- Additional Routes announced to the hosts. The format should be destination_cidr,nexthop. This is used should you wish to have separate networks that want to communicate with each other.
Click Create and it should start to create your new network

Delete a network
Log into the NeSI FlexiHPC Dashboard
Select the project you would like to deploy the new instance too (Use the project selector on the top left-hand side):
Open the Project tab, open the Network tab and select the Networks category
Select the network you wish to delete with the check box

The Delete Network button should become a solid red
Click Delete Network
Within the Confirm Delete Network dialog ensure you have selected the correct network that is displayed.
Click Delete Networks
The network should now be deleted