Manage Security Groups of an Instance
Log into the NeSI FlexiHPC Dashboard
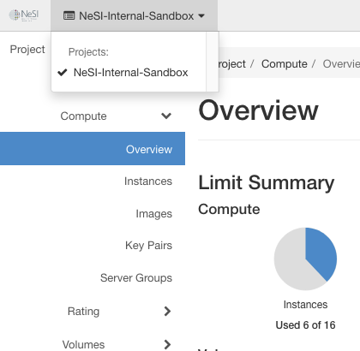
Select the project you would like to deploy the new instance too (Use the project selector on the top left-hand side):
Open the Project tab, open the Compute tab and select Instances then select the compute instance you want to manage.
Attach a Security Group
Under the Actions menu on the far right, select Edit Security Groups

Within the Edit Instance dialog you will have 2 columns
All Security Groups- These are all security groups created in your project
Instance Security Groups- These are the security groups attached to your instance
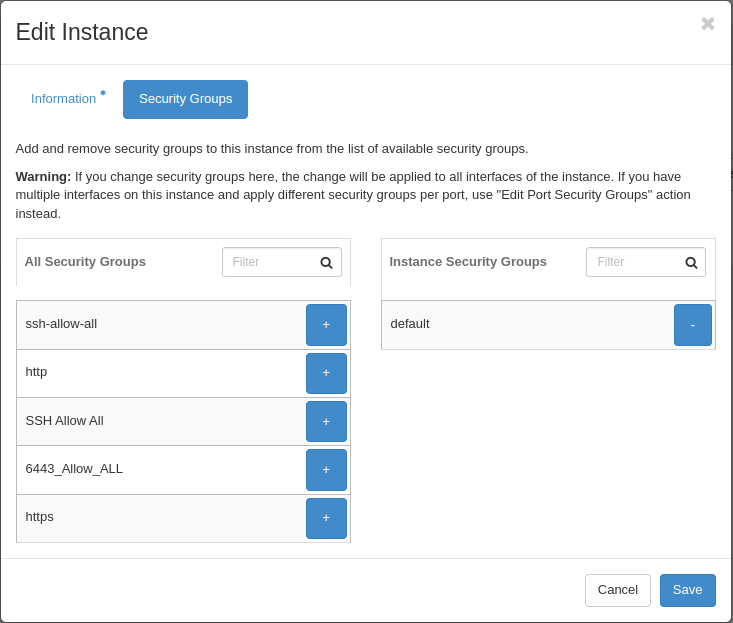
Clicking the + icon from the All Security Groups column will add them to the Instance Security Groups column

Once the desired Secuirty Groups have been added you then click save
Remove a Security Group
Under the Actions menu on the far right, select Edit Security Groups
Within the Edit Instance dialog you will have 2 columns
All Security Groups- These are all security groups created in your project
Instance Security Groups- These are the security groups attached to your instance
Clicking the - icon from the Instance Security Groups column will remove it and add it to the All Security Groups column
Once the desired Secuirty Groups have been removed you then click save