Create and Manage
Create a volume
Log into the NeSI FlexiHPC Dashboard
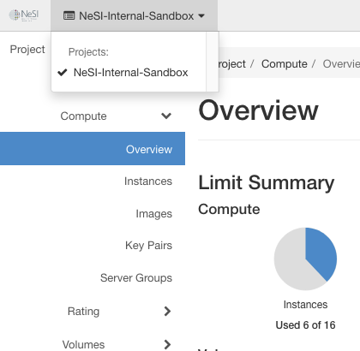
Select the project you would like to deploy the new instance too (Use the project selector on the top left-hand side):
Open the Project tab, open the Volume tab and select the Volumes category
Click Create Volume.
In the dialog box that opens, enter or select the following values.
Volume Name- Specify a name for the volume.
Description- Optionally, provide a brief description for the volume.
Volume Source-
Select one of the following options
-
No source, empty volume- Creates an empty volume. An empty volume does not contain a file system or a partition table.
-
Image- If you choose this option, a new field for Use image as a source displays. You can select the image from the list.
-
Volume- If you choose this option, a new field for Use volume as a source displays. You can select the volume from the list. Options to use a snapshot or a volume as the source for a volume are displayed only if there are existing snapshots or volumes.
-
Type-
Select one of the following options:
-
ceph-ssd- Flash based storage, this has the fastest read and write speeds however is generally priced higher
-
ceph-hdd- Spinning disk based storage, this has the slow read and write speeds compared to flash based however it is generally priced lower then flash based storage
-
ceph-ssd-encrypted- Flash based storage that is further encrypted
-
ceph-hdd-encrypted- Spinning disk based storage that is further encrypted
-
Note
All storage types are encrypted on the FlexiHPC based systems, the encrypted drives are an option to further encrypt the volume
Size (GB)- The size of the volume in gibibytes (GiB).
Availability Zone- By default this will be nova. This specifies which zone it will be deployed too if there were multiple zones. The current default and only zone is nova at this point in time.
Click Create Volume
The dashboard shows the volume on the Volumes tab.
Attach a volume to an instance
After you create one or more volumes, you can attach them to instances. You can attach a volume to one instance at a time.
Log into the NeSI FlexiHPC Dashboard
Select the project you would like to deploy the new instance too (Use the project selector on the top left-hand side):
Open the Project tab, open the Volume tab and select the Volumes category
Select the volume to add to an instance, expand the Actions column and click Manage Attachments.
In the Manage Volume Attachments dialog box, select an instance.
Click Attach Volume
The dashboard shows the instance to which the volume is now attached and the device name.
You can view the status of a volume in the Volumes tab of the dashboard. The volume is either Available or In-Use.
Now you can log in to the instance and mount, format, and use the disk.
Detach a volume from an instance
Log into the NeSI FlexiHPC Dashboard
Select the project you would like to deploy the new instance too (Use the project selector on the top left-hand side):
Open the Project tab, open the Volume tab and select the Volumes category
Select the volume to add to an instance, expand the Actions column and click Manage Attachments.
Click Detach Volume and confirm your changes.
A message indicates whether the action was successful.
Create a snapshot from a volume
Log into the NeSI FlexiHPC Dashboard
Select the project you would like to deploy the new instance too (Use the project selector on the top left-hand side):
Open the Project tab, open the Volume tab and select the Volumes category
Select the volume, expand the Actions column and click Create Snapshot.
In the dialog box that opens, enter a snapshot name and a brief description.
Confirm your changes.
The dashboard shows the new volume snapshot in Volume Snapshots tab.
Edit a volume
Log into the NeSI FlexiHPC Dashboard
Select the project you would like to deploy the new instance too (Use the project selector on the top left-hand side):
Open the Project tab, open the Volume tab and select the Volumes category
Select the volume, expand the Actions column and click Edit Volume.
In the Edit Volume dialog box, update the name and description of the volume.
Click Edit Volume.
Note
You can extend a volume by using the Extend Volume option available in the Actions dropdown list and entering the new value for volume size.
Delete a volume
Log into the NeSI FlexiHPC Dashboard
Select the project you would like to deploy the new instance too (Use the project selector on the top left-hand side):
Open the Project tab, open the Volume tab and select the Volumes category
Select the check boxes for the volumes that you want to delete.
Click Delete Volumes and confirm your choice.
A message indicates whether the action was successful.